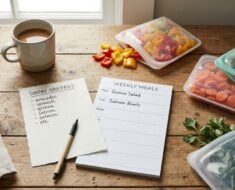
Fermenting your own food at home transforms humble vegetables into rich, tangy staples full of depth. Whether you want to preserve garden cabbages as crisp sauerkraut or turn seasonal radishes into crunchy pickles, having a designated prep and resting space makes the process far more enjoyable. Too often, jars end up scattered across busy counters, getting shoved behind appliances or exposed to changing temperatures. Creating a dedicated countertop fermentation station brings order, hygiene, and routine to this rewarding culinary craft.
A well-planned station does not require a large kitchen or commercial equipment. By carving out a modest, quiet corner and arranging a few reliable tools, you create an environment where wild cultures can develop reliably. When your fermentation zone is organized and easy to wipe down, starting a new batch becomes a natural part of your weekly cooking rhythm rather than an overwhelming project.
Choosing an Ideal Location for Stability and Airflow
The first step in setting up your station is selecting an area with stable ambient conditions. Fermenting vegetables thrive in spaces that avoid wild temperature swings. Placing jars directly next to an oven, a sunny window, or a dishwasher that vents hot steam can cause fermentation to progress too quickly, leading to soft textures or unexpected off-flavors. Look for an interior kitchen counter, a sturdy baker’s rack, or a shaded pantry shelf that stays comfortably cool and protected from direct sunlight.
Good airflow and moisture management are equally important when choosing your station footprint. Active fermentation jars release small amounts of carbon dioxide and require occasional venting, which means they should never be sealed in completely stagnant, humid cupboards. For practical ideas on maintaining healthy airflow and functional kitchen utility, exploring resources like betterhomeguide.com can give you helpful guidance on improving air circulation, surface care, and home comfort. Keeping your prep space well ventilated protects both your kitchen surfaces and your active jars.
You also want to consider accessibility. If your jars are tucked away where you cannot see them, it becomes easy to forget to check the brine levels or loosen a lid. A corner that sits just outside the main cooking traffic zone offers the best balance. You will be able to monitor the bubbling jars each morning while keeping them safe from accidental bumps while you prepare dinner.
Equipping Your Station with Reliable Essentials
A successful fermentation station relies on simple, durable supplies that resist acid and salt. High-acid vegetable brines will corrode most metals over time, so glass, food-grade silicone, ceramic, and untreated wood should be your primary materials. Having your equipment grouped together in one dedicated caddy or basket saves time whenever fresh farm produce arrives in your kitchen.
Here is a core collection of tools to keep gathered at your station:
- Wide-mouth glass canning jars in quart and larger sizes
- Dense glass fermentation weights to keep vegetables submerged
- Waterless silicone airlock lids that release gas naturally
- A solid wood tamper for packing vegetables tightly into jars
Underneath your jars, place a shallow rimmed tray made of enamel, glazed ceramic, or food-safe material. During the initial days of vigorous activity, brine can occasionally bubble up and seep past the seal. A tray catches any stray drips before they reach your countertops, making cleanup effortless. Alongside the tray, store a roll of paper tape and a washable marker so you can clearly label every jar with the preparation date and vegetable mix.
Integrating the Station with Your Living Space
A working kitchen feature does not need to look like an industrial laboratory. Fermentation is a living, traditional craft, and displaying your colorful jars on open shelves can bring warmth and character into your home. If you enjoy creating living areas that celebrate daily food traditions, leaning on styling concepts from Design Shanghai can inspire you to choose beautiful stoneware crocks, natural wood shelving, and elegant glassware that harmonize with your home decor. Treating your food preparation areas as an extension of your overall living environment makes everyday cooking feel intentional and uplifting.
To keep the visual presentation neat, stick to a unified style for your containers. Grouping matching glass jars together creates an orderly, deliberate look on open counters. If you prefer to ferment in traditional ceramic crocks, choose neutral glazes that complement your kitchen cabinetry and backsplashes. Storing small items like spare gaskets, weights, and markers in a woven basket keeps the working surface tidy between new batches.
Connecting Your Prep Routine to Pantry Supplies
A great fermentation setup works hand in hand with the rest of your kitchen storage. To start a batch quickly, you need immediate access to basic dry goods like unrefined salt, whole spices, mustard seeds, and dried herbs. Storing small jars of whole peppercorns, coriander, dill seed, and coarse salt right beside your chopping board eliminates friction during evening meal prep.
Vegetables are only half of the equation; your dry goods provide the foundation for crispness and flavor development. If you are already working on planning a sturdy home pantry, you already understand how crucial proper bulk storage is for maintaining fresh ingredients throughout the year. Keeping your salt sealed against kitchen moisture and your whole spices in dark, airtight containers helps ensure that every brine you mix will be clean and fragrant.
Develop the habit of keeping clean cutting boards and a sharp chef’s knife within reach of the station. When you slice cabbages, carrots, or cucumbers, having a wide prep surface allows you to salt and massage the vegetables right beside the jars they will live in. This tight physical arrangement prevents messy trips across the kitchen and keeps vegetable juices contained in your designated prep zone.
Establishing a Clean Daily Maintenance Routine
Hygiene is a central factor in successful vegetable fermentation. Because you are cultivating beneficial microflora while discouraging unwanted organisms, your station surfaces must stay clean. Avoid cleaning your station or tools with harsh chemical sanitizers, as lingering residues can disrupt natural fermentation. Instead, wash your jars and tools with warm soapy water, rinse them thoroughly, and allow them to air dry on a clean drying rack.
Make a quick inspection part of your daily morning routine. Take a moment while making morning coffee or tea to look over your resting jars. Check that the vegetables remain completely submerged below the brine, verify that airlocks are seated securely, and wipe away any condensation or brine residue on the outside of the glass. Catching an exposed piece of cabbage early allows you to nudge it back beneath the weight before unwanted surface mold can develop.
Once you establish a steady rhythm, your kitchen fermentation corner becomes one of the most rewarding parts of your home food system. Crisp pickles, earthy krauts, and tangy vegetable condiments provide vibrant flavor to plant-based meals while celebrating simple, whole ingredients. By setting up a dedicated space that values cleanliness, steady temperatures, and thoughtful organization, you give yourself the tools to enjoy homemade fermented staples across every season.